Important: You are required to install the Houzi Rest Api Plugin on your Houzez wordpress. To install the Plug-in, click on Houzi Rest Api Plugin Link.
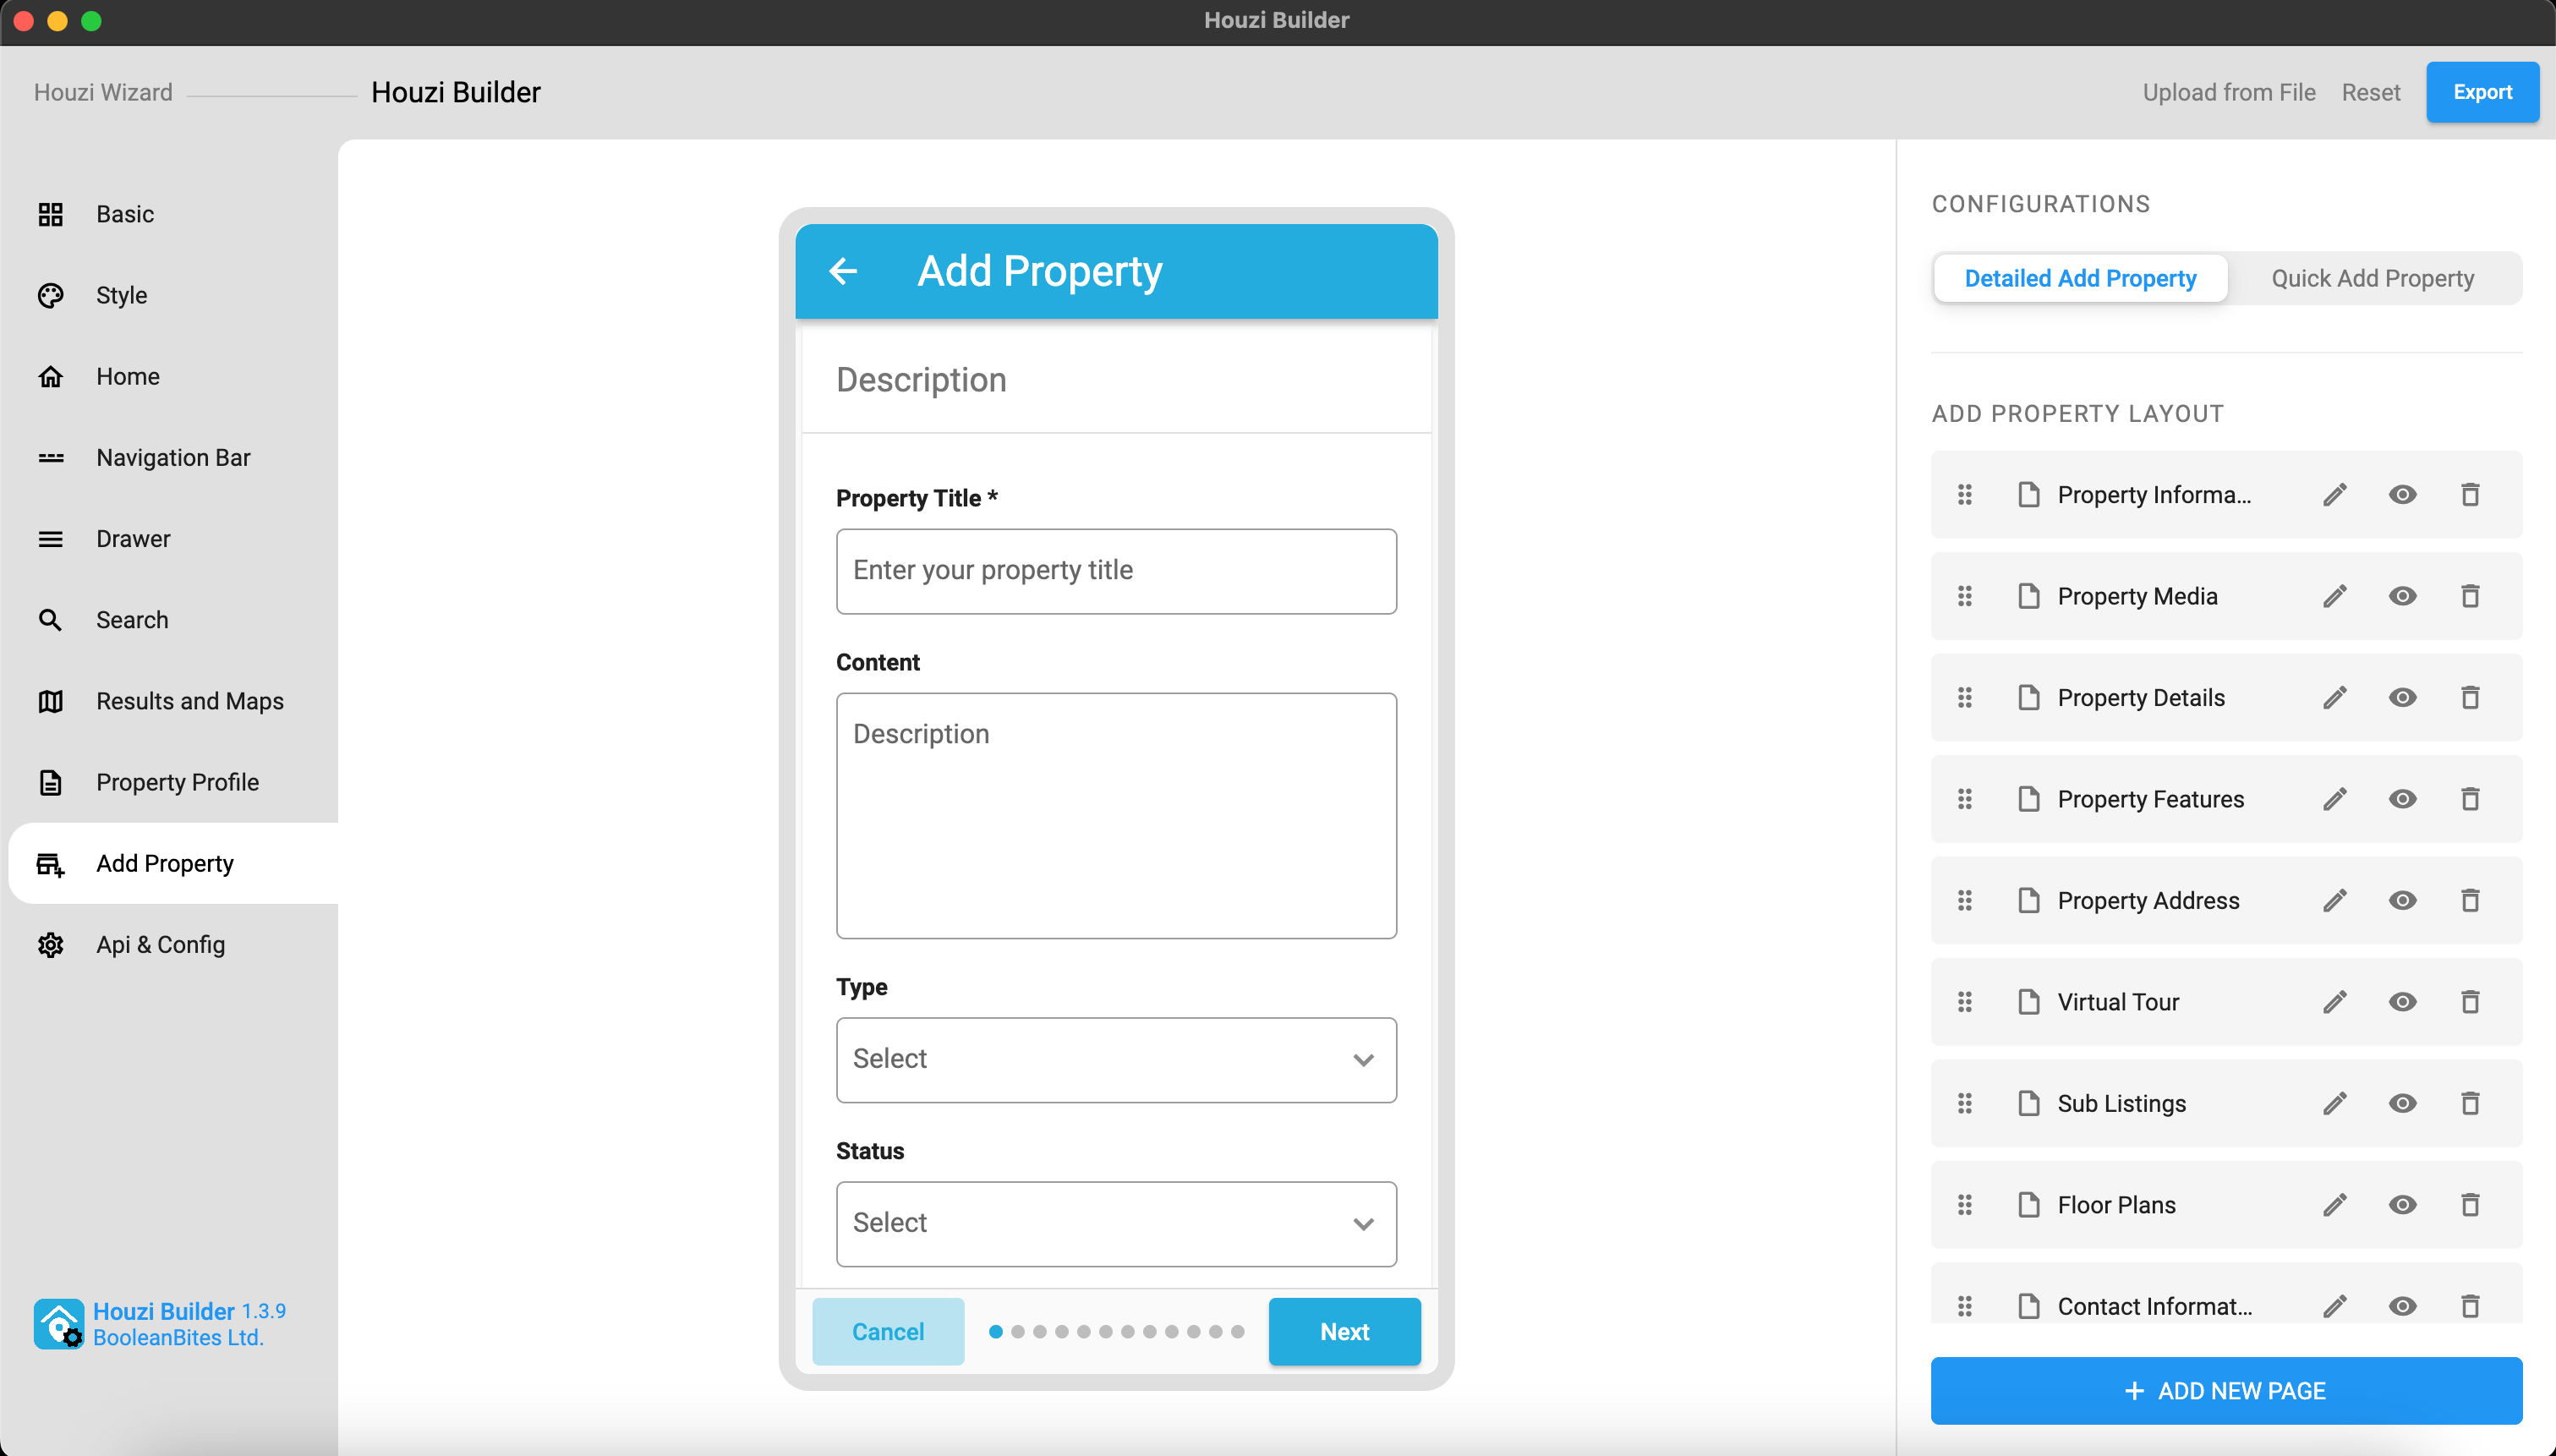
A Mobile App View is provided in the center of screen, so you can see how the modifications will look on real device.
This guide consists of following sections:
Detailed Add Property
Quick Add Property
Let’s dive into the details of each section.
Detailed Add Property
This section guides through all the steps related to detailed add property form. This section consists of following sub-sections:
-
Add New Page
This section guides through all the steps related to adding new Form Page. You can have single or multiple form pages (as per you desired) for Add Property purposes. -
Add New Section
This section guides through all the steps related to adding new Form Section. In a Form Page, you can have single or multiple form sections (as per you desired). -
Add New Field
This section guides through all the steps related to adding new Form Field. In a Form Page, you can have single or multiple form fields (as per you desired). -
Edit Page
This section guides through all the steps related to editing Form Page. You can Re-arrange, Hide or Delete a form page. You can also Add new sections or Remove existing sections in the form page. -
Edit Section
This section guides through all the steps related to editing Form Section. You can Re-arrange, Hide or Delete a form section. You can also Add new fields or Remove existing fields in the form section. -
Edit Field
This section guides through all the steps related to editing Form Field. You can Re-arrange, Hide or Delete a form field. You can also customize the existing form field. -
Re-arrange
This section guides through all the steps related to Re-arrange a Form Page, Form Section and Form Field.
Quick Add Property
This section guides through all the steps related to quick add property form. This section consists of following sub-sections.
-
Add New Field
This section guides through all the steps related to adding new Form Field. In a Form Page, you can have single or multiple form fields (as per you desired). -
Edit Field
This section guides through all the steps related to editing Form Field. You can Re-arrange, Hide or Delete a form field. You can also customize the existing form field. -
Re-arrange
This section guides through all the steps related to Re-arrange a Form Page, Form Section and Form Field.
Add New Page
You can Add a new Page in Add Property Form by following these steps:
-
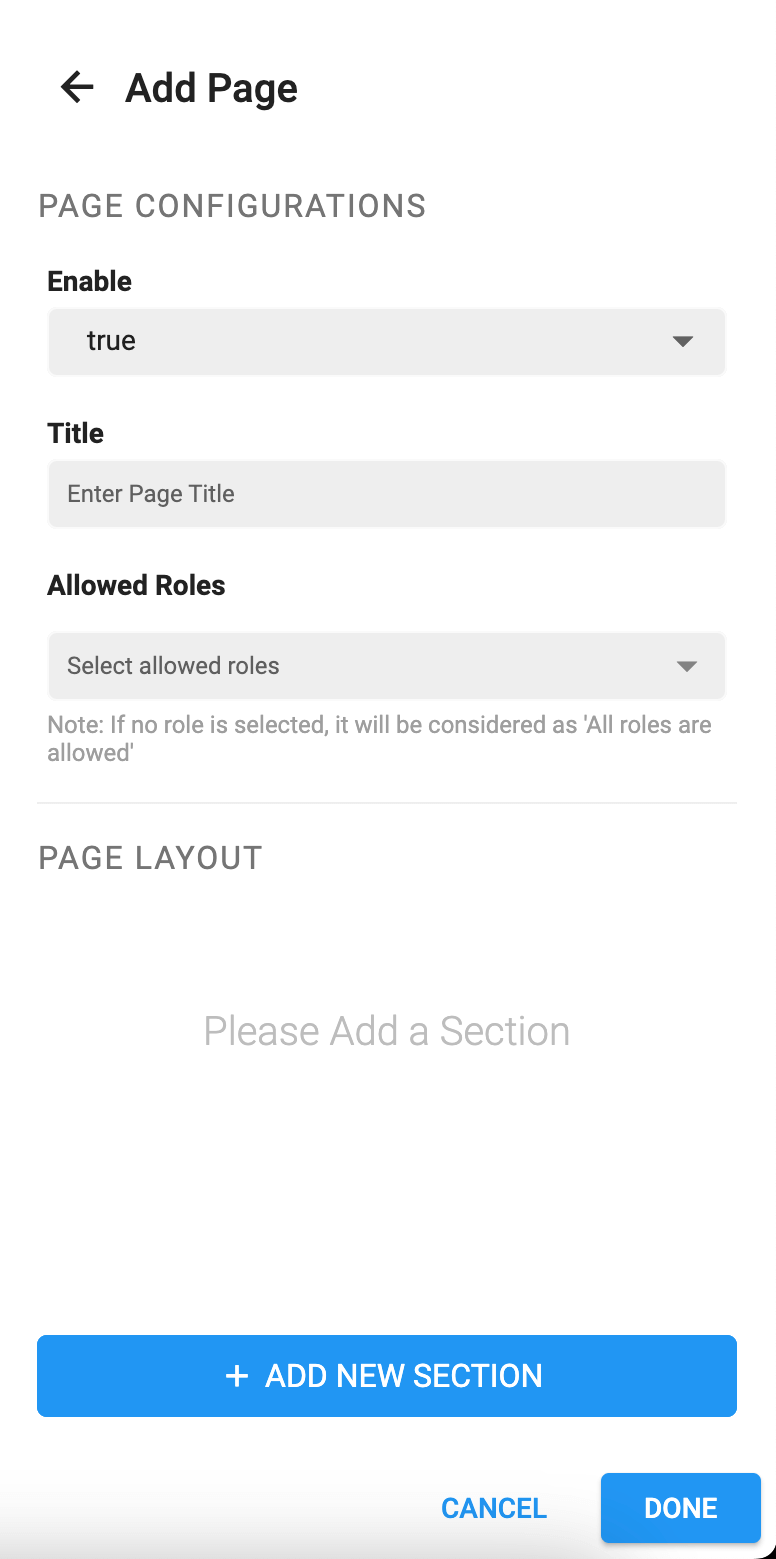
Press the Add Page button at the right bottom of the screen, a dialog box will open.
-
The value of Enable field determines wether to show/hide the page. If you and to show the page, set the value to true. If you and to hide the page, set the value to false.
-
Enter the Title of page.
-
If you want to restrict this page to some specific users e.g. administrator, houzez_agnecy etc., select these specific roles from the Allowed Roles multiselect dropdown menu. If you want to make the page public (available to all users), unselect all the roles (if any role is selected).
-
Now Add New Section/Sections in this page.
-
Click Done button and a new page will be added in the Add Property Form.
-
By clicking Cancel button, all changes will be discarded and page will not be added in the Add Property Form.
-
If you have multiple form pages and you want to re-arrnage the posotion of a particular form page, you can simply Re-arrange the form page as per your desire.
Add New Section
You can Add a new Section in Page by following these steps:
-
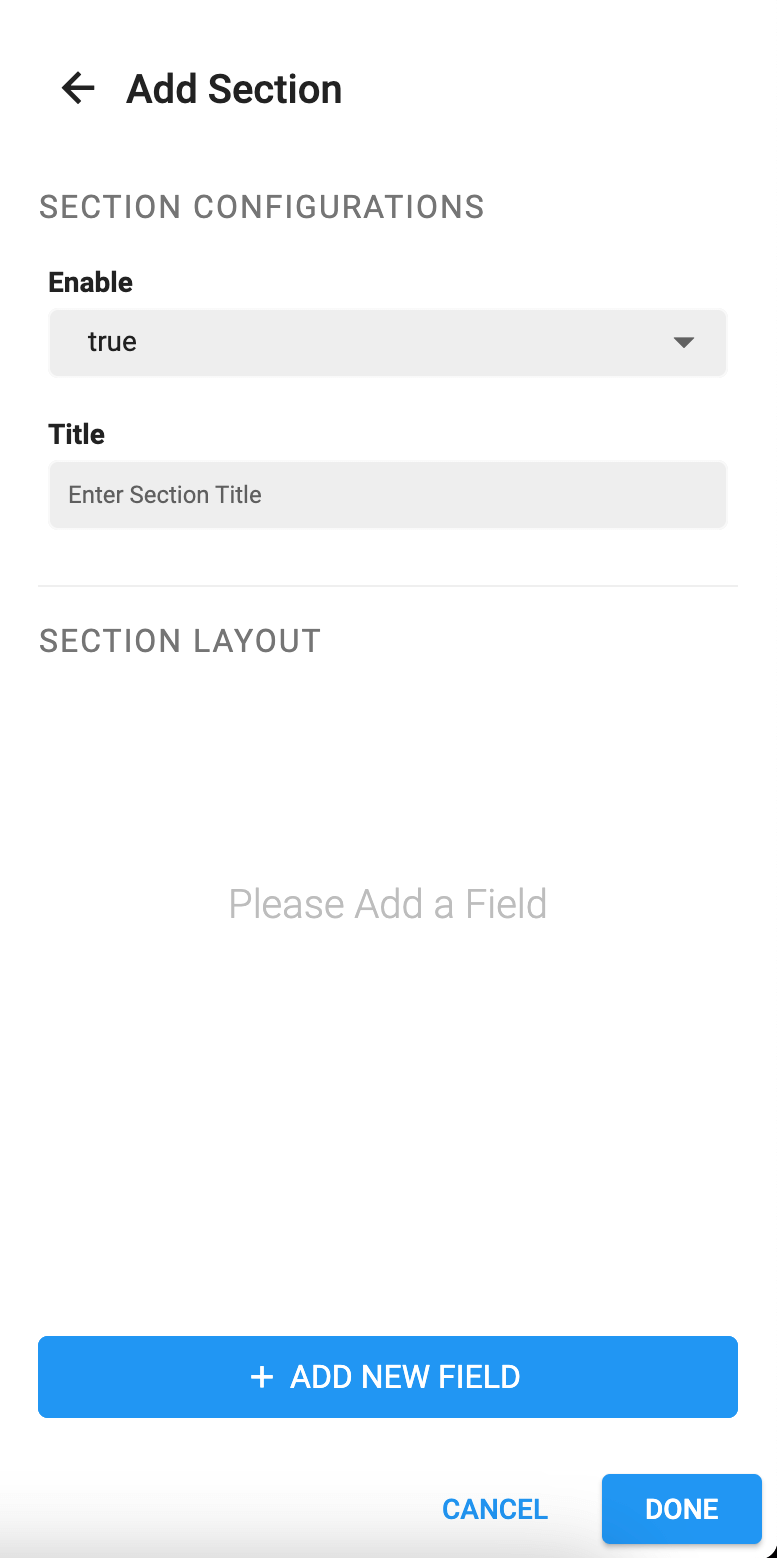
Press the Add Section button at the right bottom of the screen, a dialog box will open.
-
The value of Enable field determines wether to show/hide the section on page. If you and to show the section, set the value to true. If you and to hide the section, set the value to false.
-
Enter the Title of section.
-
Now Add New Field/Fields in this section.
-
Click Done button and a new section will be added in the page.
-
By clicking Cancel button, all changes will be discarded and section will not be added in the page.
-
If you have multiple form sections and you want to re-arrnage the posotion of a particular form section, you can simply Re-arrange the form section as per your desire.
Add New Field
You can Add a new Field in Section by following these steps:
-
Press the Add Field button at the right bottom of the screen, a dialog box will open.
<img src=”../../images/add_new_field_dialog.png” alt=”add-new-field-dialog” title=”add-new-field-dialog” width=”300” height=”600”border= “1px solid”/>
-
Enable
The value of Enable field determines wether to show/hide the field on section. If you and to show the field, set the value to true. If you and to hide the field, set the value to false.
-
Make Field Required
If you want to make the input of any field required, set the value of Make Field Required as true. Similarly if you want to make the input of any field optional, set the value of Make Field Required as false.
-
Allowed Roles
If you want to restrict this field to some specific users e.g. administrator, houzez_agnecy etc., select these specific roles from the Allowed Roles multiselect dropdown menu. If you want to make the field public (available to all users), unselect all the roles (if any role is selected).
-
Field Type
It is the type of Form Widget that you want to display on screen. e.g. Input Text Field, Dropdown etc. Select the desired Form Widget Type from Field Type dropdown.
<img src=”../../images/field_type_dropdown.png” alt=”field-type-dropdown” title=”field-type-dropdown” width=”300” height=”600”border= “1px solid”/>
The description of Field Type is as follows:
-
formTextField:
formTextField should be used, if you want to take text input from user. e.g. Property Title, Property Price etc. You can define some assisting attributes like Hint, Additional Hint, Validation Types, Max Lines and Keyboard Type etc. -
formPricePlaceHolderField:
formPricePlaceHolderField should be used, if you want to take Price Placeholder text value from the user.Note: formPricePlaceHolderField is non-editable field (attributes like Api Key and Title are fixed.)
-
formMultiSelectField:
formMultiSelectField should be used, if you want to take single/multiple inputs of any Houzez Taxonomies, from the user. e.g. Property Features (e.g. Garage, Pool etc.), Property Type (Commercail, Office etc.) etc. You have to choose the Term type e.g. property_type, property_status, property_feature etc. from the Term Type dropdown. You can define some assisting attributes like Hint, Additional Hint etc. -
formDropDownField:
formDropDownField should be used, if you want to take single input of any Houzez Taxonomy, from the user. e.g. Property Features (e.g. Garage, Pool etc.), Property Type (Commercail, Office etc.) etc. You have to choose the Term type e.g. property_type, property_status, property_feature etc. from the Term Type dropdown. You can define some assisting attributes like Hint, Additional Hint etc. -
formStepperField:
formStepperField should be used, if you want to take such user input in which user can increase or decrease some value with the help of steppers. e.g. Number of bedrooms, Number of bathrooms etc. -
formMediaField:
formMediaField should be used, if you want to take media from user e.g. photos etc.Note: formMediaField is non-editable field (attributes like Api Key and Title are fixed.)
-
formAdditionalDetailsField:
formAdditionalDetailsField should be used, if you want to take some additional details/features about property from user e.g. Equipment: Grill - Gas, Deposit: 20% etc.Note: formAdditionalDetailsField is non-editable field (attributes like Api Key and Title are fixed.)
-
formCustomField:
formCustomField should be used, if you want to take user input in your custom defined Houzez fields.Note: formCustomField is non-editable field (attributes like Api Key and Title are fixed.)
-
formMapField:
formMapField should be used, if you want to take user location from Google Maps and display location as latitude and longitude.Note: formMapField is non-editable field (attributes like Api Key and Title are fixed.)
-
formCheckBoxListField:
formCheckBoxListField should be used, if you want to show a list of any Houzez Taxonomy and take single/multiple input from the user. e.g. Property Features (e.g. Garage, Pool etc.) etc. You have to choose the Term type e.g. property_feature etc. from the Term Type dropdown. -
formRadioButtonField:
formRadioButtonField should be used, if you want to take user input from Radio Group. You can define the Radio Option through Field Values as follows:-
Click on Field Values text area, a dialog will open.
<img src=”../../images/add_field_value_dialog.png” alt=”add-field-value-dialog” title=”add-field-value-dialog” width=”300” height=”460”border= “1px solid”/>
-
Click on Add Field Values button, two field will be display. You can add options in ‘key value’ pair. Key will be the option to diplay on screen and its Value will be sent against the Api key. e.g. Key: No, Value: 0, Key: Yes, Value: 1, etc.
<img src=”../../images/add_field_value_dialog_01.png” alt=”add-field-value-dialog-01” title=”add-field-value-dialog-01” width=”300” height=”460”border= “1px solid”/>
-
By clicking (x) button, the key-value pair option will be discarded.
-
Click Done button and a Field Value will be added.
-
By clicking Cancel button, all changes will be discarded and Field Value will not be added.
-
-
floorPlansField:
floorPlansField should be used, if you want to take user input about Floor Plans.Note: floorPlansField is non-editable field (attributes like Api Key and Title are fixed.)
-
multiUnitsField:
multiUnitsField should be used, if you want to take user input about MultiUnits/Sub-Listings.Note: multiUnitsField is non-editable field (attributes like Api Key and Title are fixed.)
-
multiUnitsIdsField:
multiUnitsIdsField should be used, if you want to add other properties as multiunits or sub-listings of some particular property.- Note: multiUnitsIdsField is restricted to Administrator use only.
- multiUnitsIdsField is non-editable field (attributes like Api Key and Title are fixed.)
-
realtorContactInformationField:
realtorContactInformationField should be used, if you want to display any particular realtor (e.g. admin, agency, agent or other user etc.) contact information in the property details.- Note: realtorContactInformationField is restricted to administrator & houzez_agnecy use only.
- realtorContactInformationField is non-editable field (attributes like Api Key and Title are fixed.)
-
formGDPRAgreementField:
formGDPRAgreementField should be used, if you want to display any particular realtor (e.g. admin, agency, agent or other user etc.) contact information in the property details.Note formGDPRAgreementField is non-editable field (attributes like Api Key and Title are fixed.)
-
-
Api Key [ Required ]
Select the Api key from the dropdown menu. The corresponding data of field will be sent to this key when Add Property API will be called. e.g. the data related to Property Title field will be sent against prop_title key etc.
<img src=”../../images/api_key_dropdown.png” alt=”api-key-dropdown” title=”api-key-dropdown” width=”300” height=”600”border= “1px solid”/>
The description of Api Keys is as follows:
-
prop_title:
This key must be selected if you are taking user input related to Property Title. -
prop_des
This key must be selected if you are taking user input related to Property Description. -
prop_type[]:
This key must be selected if you are taking user input related to Property Type. e.g. Commercial, Residential, Office, Appartment etc. -
prop_status[]:
This key must be selected if you are taking user input related to Property Status. e.g. For-Rent, For-Sale etc. -
prop_label[]:
This key must be selected if you are taking user input related to Property Label. e.g. Hot Offer, Open House etc. -
prop_price:
This key must be selected if you are taking user input related to Property Price. -
prop_label:
This key must be selected if you are taking user input related to Property After Price. e.g. Monthly etc. -
prop_price_prefix:
This key must be selected if you are taking user input related to Property Price Prefix. e.g. Starts from etc. -
prop_sec_price:
This key must be selected if you are taking user input related to Property Second Price. -
prop_video_url:
This key must be selected if you are taking user input related to Property Video URL. (Video could be uploaded on Youtube, Vimeo or as SWF File, MOV Files etc.) -
prop_rooms:
This key must be selected if you are taking user input related to Property Rooms. -
prop_beds:
This key must be selected if you are taking user input related to Property Bedrooms. -
prop_baths:
This key must be selected if you are taking user input related to Property Bathrooms. -
prop_size:
This key must be selected if you are taking user input related to Property Size. -
prop_size_prefix:
This key must be selected if you are taking user input related to Property Size Prefix. e.g. sq ft etc. -
prop_land_area:
This key must be selected if you are taking user input related to Property Land Area Size. -
prop_land_area_prefix:
This key must be selected if you are taking user input related to Property Land Area Size Prefix. e.g. sq ft etc. -
prop_garage:
This key must be selected if you are taking user input related to Property Garage. -
prop_garage_size:
This key must be selected if you are taking user input related to Property Garage Size. -
prop_year_built:
This key must be selected if you are taking user input related to Property Year Built. -
prop_features[]:
This key must be selected if you are taking user input related to Property Features. e.g. Air Conditioning, Lawn, Swimming Pool, Wifi etc. -
property_map_address:
This key must be selected if you are taking user input related to Property Address. -
country:
This key must be selected if you are taking user input related to Property Country. -
administrative_area_level_1:
This key must be selected if you are taking user input related to Property State. -
locality:
This key must be selected if you are taking user input related to Property City. -
neighborhood:
This key must be selected if you are taking user input related to Property Area. -
postal_code:
This key must be selected if you are taking user input related to Property Zip Code. -
virtual_tour:
This key must be selected if you are taking user input related to Property Virtual Tour. -
prop_featured:
This key must be selected if you are taking user input related to Making Property Featured.Note: prop_featured is restricted to Administrator use only.
-
login-required:
This key must be selected if you are taking user input related to Making sure that user is Logged-in to view the Property Details.Note: login-required is restricted to Administrator use only.
-
fave_property_disclaimer:
This key must be selected if you are taking user input related to Property Disclaimer.Note: fave_property_disclaimer is restricted to Administrator use only.
-
fave_private_note:
This key must be selected if you are taking user input related to Property Private Note.
-
-
Title [Required]
Title is used as label or heading for your field. e.g. Property Title etc.
Note: Title of some fields (e.g. Additional Details, FLoor Plans etc.) will be non-editable.
-
Hint
Hint is used as place holder for your field. e.g. Enter property title etc.
-
Additional Hint
Additional Hint is used to provide extra assisting information about the field. e.g. additional hint of property price field: Only digits etc.
-
Validation Types
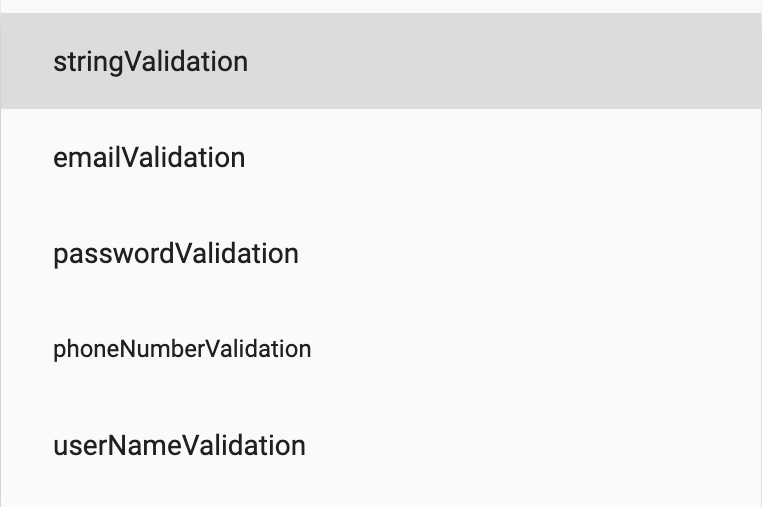
You can validate the input of your field by using validation Types. Validation Types are defined as follows:
-
String Validation:
String Validation is used to check if the input is non-empty. Otherwise it will return error. -
Email Validation:
Email Validation is used to check if the entered input is properly email-formatted. Otherwise it will return error. -
Password Validation:
Password Validation is used to check if the entered input is properly password-formatted. Otherwise it will return error. -
Phone Number Validation:
Phone Number Validation is used to check if the entered input is properly phone-number-formatted. Otherwise it will return error. -
User Name Validation:
User Name Validation is used to check if the entered input is properly user-name-formatted. Otherwise it will return error.
-
-
Max Lines
Max Lines is used to define the maximum lines of field. If you want to show a Text Area for any property attribute e.g. Property Description, simply set the max lines to 5 or 7 as you desire.
-
Keyboard Type
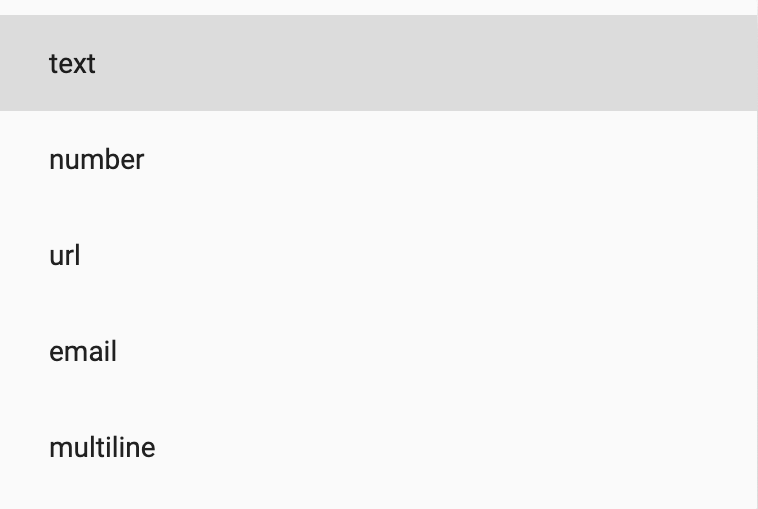
You can define the type of Keyboard you want to use for the input of your field. Keyboard Type are defined as follows:
-
Text:
Text is used to if you want to show normal keyboard for text input. -
Number:
Number is used to if you want to show Numeric keyboard for text input. -
URL:
URL is used to if you want to show URL assistive keyboard for URL input. -
Email:
Email is used to if you want to show Email assistive keyboard for email input. -
MultiLine:
MultiLine is used to if you want to show text keyboard for multi-line input.
-
-
Term Type [Required]
Term Type is a dropdown list of Houzez Taxonomies. If you want to show a list of any Houzez Taxonomy and take single/multiple input from the user. e.g. Property Features (e.g. Garage, Pool etc.) etc. You can select required taxonomy e.g. property_feature etc. from this dropdown.
Note: If you have selecetd the field type formMultiSelectField, formDropDownField or formCheckBoxListField, you must select a taxonomy.
-
Click Done button and a new field will be added in the section.
-
By clicking Cancel button, all changes will be discarded and field will not be added in the section.
- If you have multiple form fields and you want to re-arrnage the posotion of a particular form field, you can simply Re-arrange the form field as per your desire.
Edit Page
Form Page Item Screenshot

You can perform following opertions while Editing a page.
Show or Hide a Page
You can show/hide a form page just by clicking on show/hide icon of Form Page Item.
Delete a Page
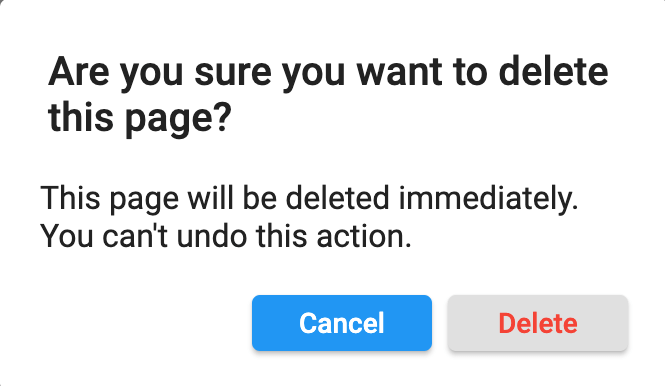
You can delete a form page just by clicking on delete icon of Form Page Item. A delete confirmation dialog will open. On clicking Cancel, the action will be discarded and dialog will be closed. On clicking Delete, the page will be deleted (this action can not be undone).
Edit a Page
You can Edit a Form Page by following these steps:
-
Press the Edit icon of Form Page Item, a dialog box will open.
<img src=”../../images/edit_page_dialog.png” alt=”edit-page-dialog” title=”edit-page-dialog” width=”300” height=”600”border= “1px solid”/>
-
The value of Enable field determines wether to show/hide the page. If you and to show the page, set the value to true. If you and to hide the page, set the value to false.
-
If you want to rename the page, simply provide the new Title of page.
-
If you want to restrict this page to some specific users e.g. administrator, houzez_agnecy etc., select these specific roles from the Allowed Roles multiselect dropdown menu. If you want to make the page public (available to all users), unselect all the roles (if any role is selected).
-
If you have single or multiple sections in the page, you can Edit Section/Sections.
-
If you have no section in the page, you can Add New Section/Sections.
-
Click Done button, all modifications will applied to the page.
-
By clicking Cancel button, all modifications will be discarded.
Edit Section
Form Section Item Screenshot

You can perform following opertions while Editing a section.
Show or Hide a Section
You can show/hide a form section just by clicking on show/hide icon of Form Section Item.
Delete a Section
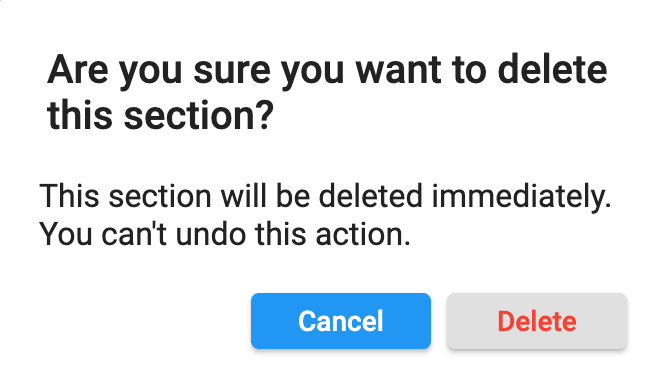
You can delete a form section just by clicking on delete icon of Form Section Item. A delete confirmation dialog will open. On clicking Cancel, the action will be discarded and dialog will be closed. On clicking Delete, the section will be deleted (this action can not be undone).
Edit a Section
You can Edit a Form Section in the Page by following these steps:
-
Press the Edit icon of Form Section Item, a dialog box will open.
<img src=”../../images/edit-section-dialog.png” alt=”edit-section-dialog” title=”edit-section-dialog” width=”300” height=”600”border= “1px solid”/>
-
The value of Enable field determines wether to show/hide the section on page. If you and to show the section, set the value to true. If you and to hide the section, set the value to false.
-
If you want to rename the section, simply provide the new Title of section.
-
If you have single or multiple form fields in the page, you can Edit Field/Fields.
-
If you have no field in the section, you can Add New Field/Fields.
-
Click Done button, all modifications will applied to the section.
-
By clicking Cancel button, all modifications will be discarded.
Edit Field
Form Field Item Screenshot

You can perform following opertions while Editing a field.
Show or Hide a Field
You can show/hide a form field just by clicking on show/hide icon of Form Field Item.
Delete a Field
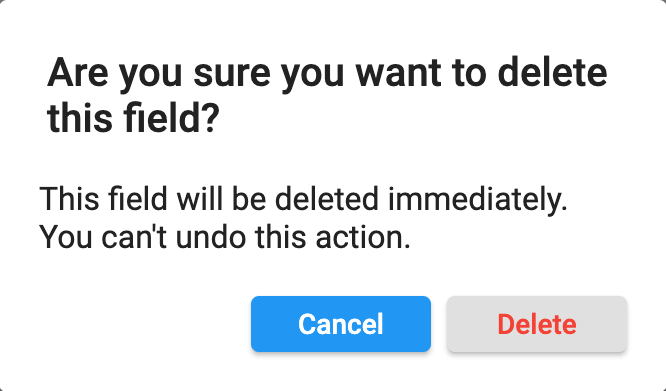
You can delete a form field just by clicking on delete icon of Form Field Item. A delete confirmation dialog will open. On clicking Cancel, the action will be discarded and dialog will be closed. On clicking Delete, the field will be deleted (this action can not be undone).
Edit a Field
You can Edit a Form Field in the Form Section by following these steps:
-
Press the Edit icon of Form Field Item, a dialog box will open.
<img src=”../../images/edit-field-dialog.png” alt=”edit-field-dialog” title=”edit-field-dialog” width=”300” height=”600”border= “1px solid”/>
-
The value of Enable field determines wether to show/hide the field on section. If you and to show the field, set the value to true. If you and to hide the field, set the value to false.
-
If you want to make the input of field required, set the value of Make Field Required as true. Similarly if you want to make the input of field optional, set the value of Make Field Required as false.
-
If you want to restrict this field to some specific users e.g. administrator, houzez_agnecy etc., select these specific roles from the Allowed Roles multiselect dropdown menu. If you want to make the field public (available to all users), unselect all the roles (if any role is selected).
-
You change the Field Type as per your desire.
-
You change the Api Key as per your desire.
- If you want to rename the field, simply provide the new Title of field.
Note: Title of some fields (e.g. Additional Details, FLoor Plans etc.) will be non-editable.
-
Click Done button, all modifications will applied to the field.
- By clicking Cancel button, all modifications will be discarded.
Re-Arrange
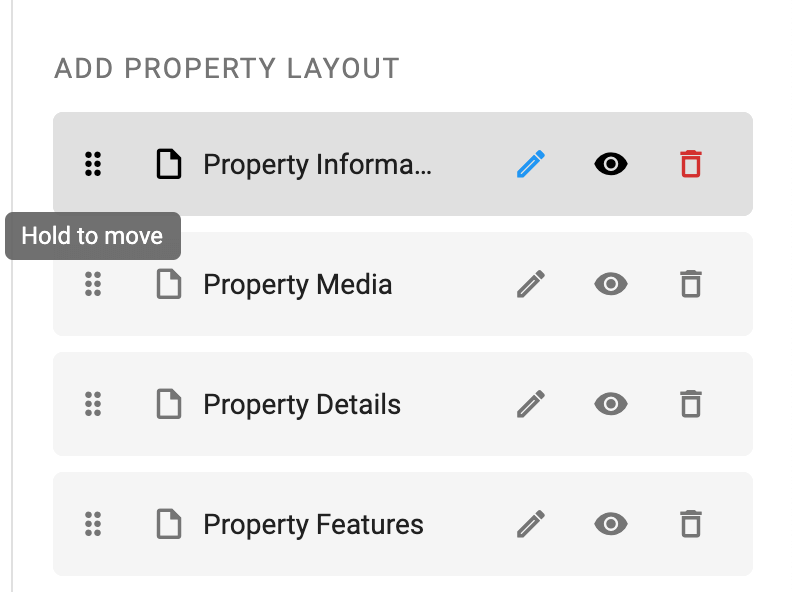
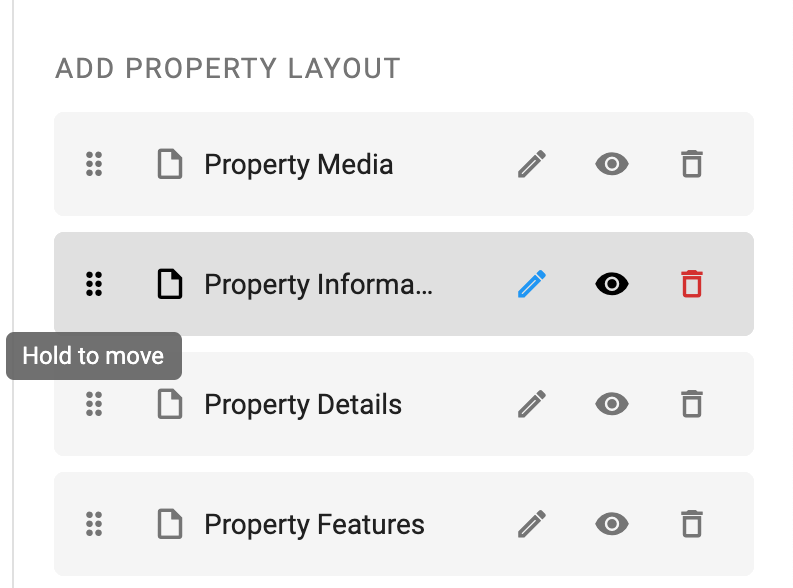
You can perform the Re-arrange action just by Holding the page, section or field item and move it vertically (upwards or downwards). Place it on desire position in related list.
