To setup ads on Houzi app, you need following things:
- Android App ID on Admob
- iOS App ID on Admob
- Native Advanced Ad Id for Android App
- Native Advanced Ad Id for iOS App
Create Apps in Admob
Register your app as an AdMob app by completing the following steps:
- Sign in to or Sign up for an AdMob account.
- Register your app with AdMob. This step creates an AdMob app with a unique AdMob App ID for each platform. You can also choose your already released app on both stores.
- Copy App ID of both apps.
Create Native Advanced Ad Unit
Once apps for each platform are created, it is time to create a native ad unit. follow this link to create these ads: Create a native ad unit.
When you’ve acquired Native Ad Unit IDs, configure it in the app in the steps below.
Setup Admob App ID
After getting your app AdMob App ID go to:
- Android houzi > android > app > src > main > res > values > strings.xml file, and look for google_ads_app_id. Replace its value with your own AdMob App ID.
- iOS Project_HOME > ios > Runner > Info.plist file, and look for GADApplicationIdentifier. Replace its value with your own AdMob App ID.
Enable iOS App Tracking Transparency
You need to enable App Tracking Transparency in iOS Project. Follow here: Setup iOS ads tracking
Good to remember: After creating AdMob app, update your
GoogleServices-Info.plistfor iOS andgoogle-services.jsonfor android by downloading fresh copy from firebase.
Add/Change AdMob Native Advanced Ad ids by Houzi Config
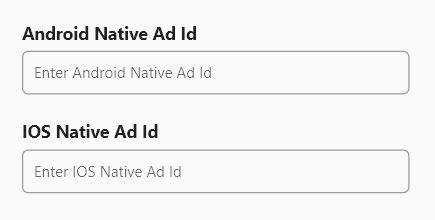
Open houzi config and go to the section Api & Config. Enter your Android and iOS native ads id here
Add/Change AdMob Native Advanced Ad by editing config.json
Copy that native ad unit and go to the Project_HOME > assests > configuration > configuration.json file, and look for android_native_ad_id for android and ios_native_ad_id for IOS. Replace its value with your own native ad unit.
Make sure set the value of show_ads: true to turn on the ads
Add/Change AdMob Native Advanced Ad by editing constants.dart
Copy that native ad unit and go to the Project_HOME > packages > houzi_package > lib > common > constants.dart file, and look for ANDROID_NATIVE_AD_ID for android and IOS_NATIVE_AD_ID for IOS. Replace its value with your own native ad unit.
Make sure set the value of SHOW_ADS=true to turn on the ads
Enable Ad Validator to Debug your ads
AdMob sdk provides a way to validate your ads on screen. We’ve disabled the ad validator by default. However you can enable the ad validator to check if you’ve any issues with your configurations.
Enable Ad Validator Android
Open houzi > android > app > src > main > AndroidManifest.xml file, and look for com.google.android.gms.ads.flag.NATIVE_AD_DEBUGGER_ENABLED. Replace its value android:value="false" to true.
Enable Ad Validator iOS
Open file Project_HOME > ios > Runner > Info.plist file, and look for GADNativeAdValidatorEnabled. Replace its next tag <false/> with <true/>
This will enable ad validator for your app.
Good to remember: After AdMob has been integrated, Google may ask you to verify your apps ownership via app-ads.txt. It will ensure your app ad inventory is only sold through channels you’ve identified as authorized.
Previous: Setup Phone sign in Next: Setup iOS ads trackingGood to remember: After AdMob has been integrated, it is best to link your apps with your firebase. The Linked services page allows you to turn on user metrics and link your apps to Firebase from a single page in your AdMob account. Readmore about Linked Services.
